Let’s break down KuCoin crypto trading bots.
What do they do? When should you use them? How exactly do you set them up?
And of course, how much money can you possibly make from them?
Getting Started: KuCoin Bot Page
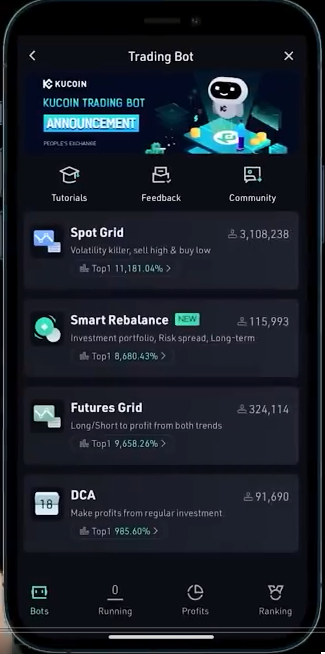
To get started, go to the trading bot menu. Open up KuCoin and click the trading bot button on the home screen. Here you’ll find four pages.
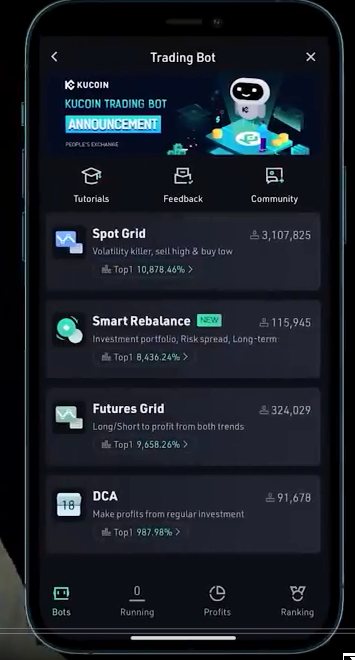
The first page is “Bots”. This is where you’ll create new bots. Here you can also click tutorials for lots of helpful tips and videos about KuCoin bots.
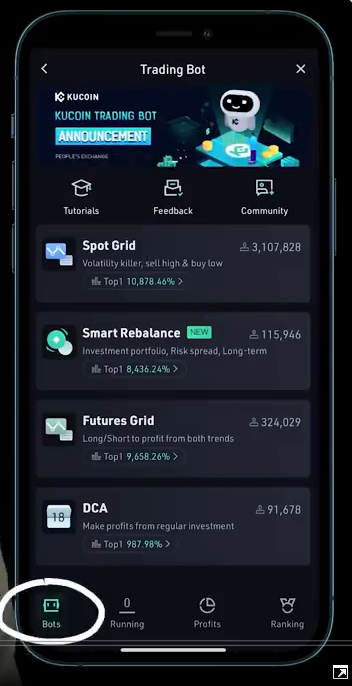
The second page is “Running”. This is where you’ll find any of your currently running bots.

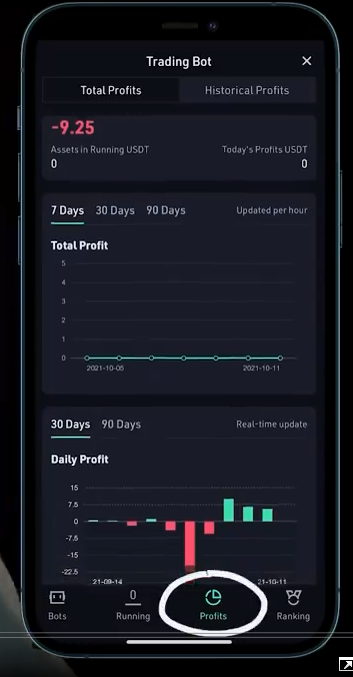
The third page is “Profits”. This is where you can see an overview of all your profits or losses from your trading bots.
And the fourth page is “Ranking”. This is basically a leaderboard for everyone using trading bots. In here you can see how much money or how much losses each and every person has made.
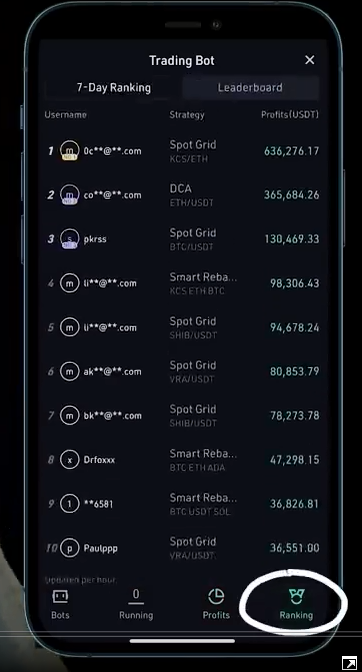
One important thing to note is KuCoin analyzes all the returns shown on the leaderboard, which is why it says APR. However, you can clearly see that most of these bots haven’t even been running for two days. So these percentages are not realistic.
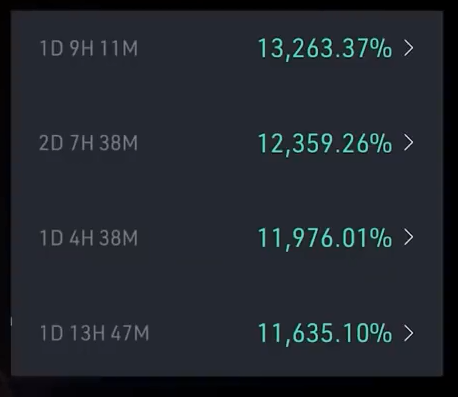

The top bots hit upwards of around 10 to 20% returns on a fantastic day. However, there is absolutely no way they’re getting that every single day for an entire year.
How Spot Grid Bot Works

This is probably the most exciting of the four bots. The spot grid trading bot is designed to thrive in a volatile market by quickly buying and selling as the price of a coin fluctuates. It does this by placing a range of buy and sell orders between two specific price points. And this is where it gets its name as this spread of buy and sell orders creates a grid.

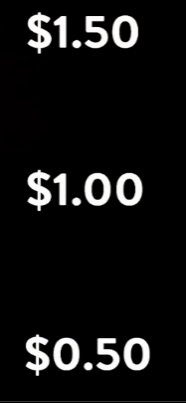
So let’s do an example; the price of a crypto is $1. You start a grid trading bot with a range of 50 cents to $1.50. If the price drops below $1, the bot buys. If it increases in price, it sells. So let’s say our coin drops below $1, the bot will then buy. If the price dropped further, it would buy more and more as it hit more of those buy orders aka gridlines. Finally, it will stop buying if that price hits a low point of 50 cents. If it goes below 50 cents, it wouldn’t buy any more. Then let’s say the price starts increasing and it climbs above $1, the bot will then begin to sell and the higher climbs above $1. It hits more grid cell lines and it will sell more and more until the price hits $1.50 in which it will not sell any more because there’s nothing left to sell.
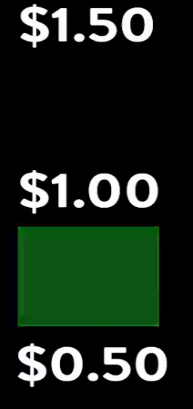
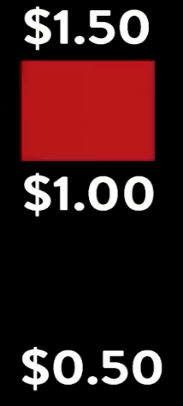
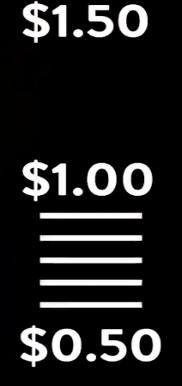
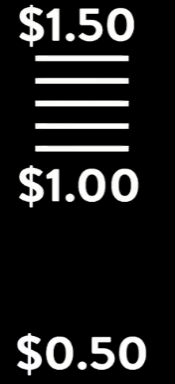
The spot grid bot makes money by buying low and selling high again and again.
So when should you use this bot?
The grid trading bot is amazing for volatile markets. This is similar to how you could short a coin with futures if you’re bearish on its price. This is what you would do if you think a coin will just bounce around at a fairly stable price for a while.
Risk Management
Another great use for grid trading bots is “Risk Management”. Grid trading bots allow you to profit off of price movement without the risk of human error or bad luck. And it caps your downside risk. Grid trading bots run 24/7 and stick to strict parameters. So that means you don’t have to worry about panic buying or selling or missing out on action because you’re sleeping.
You also need to check the fees at the time of starting your bot. If your profits between each buy and sell are too small that the transaction fees cost more than your profit, then it doesn’t make sense to run this bot.
KuCoin, unlike some other platforms, takes this fee into account when telling you your profits per grid.
How To Set Up A Grid Bot
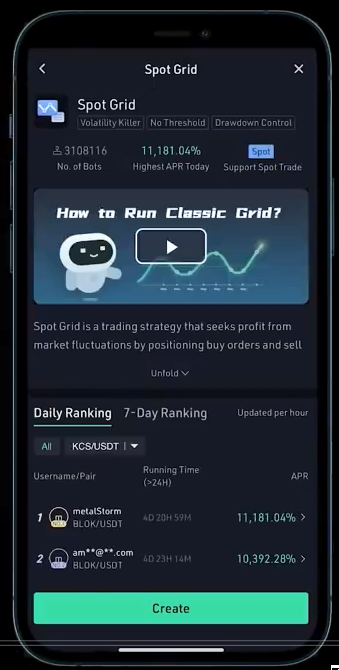
- Go to the bot page and click a spot grid. This will bring you to the bots specific leaderboard mentioned earlier. Then click Create.
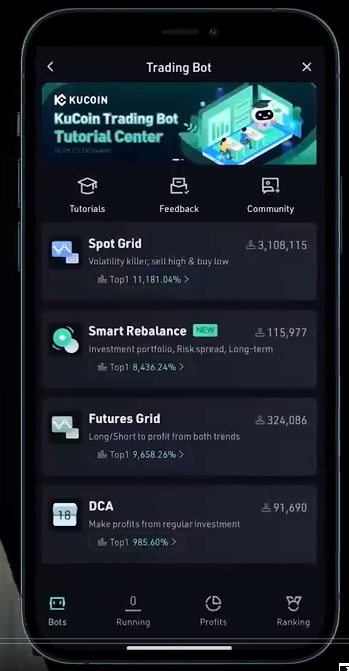
- Then you will see two options: AI parameters or customize. AI selects the price range for you based on the price history of that specific coin.
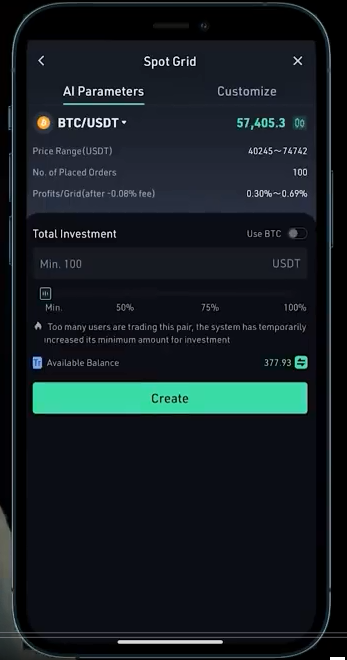
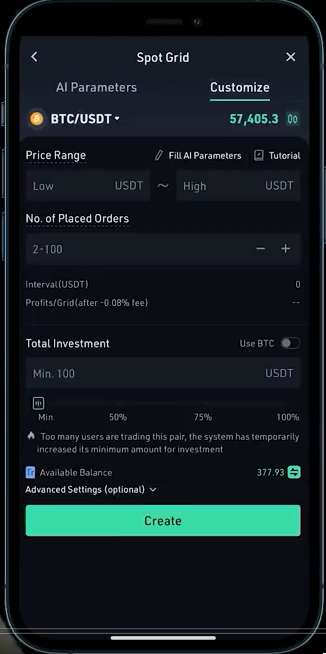
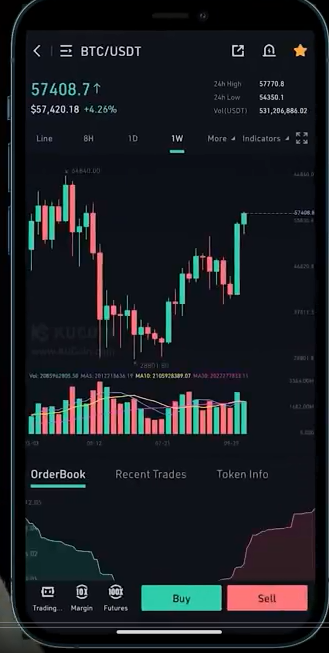
- Pick your investment and click Create. If you want to customize the bot yourself, look back in the price history as far as you plan on running the bot.
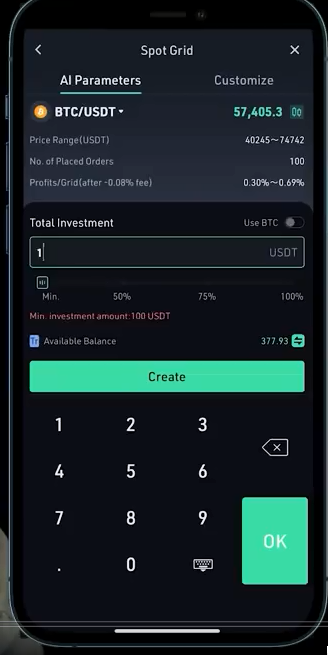
So, if you plan on running a bitcoin grid trading bot for six months, then you want to look back six months and see the low and high price for that range, which is about 30,000 to 60,000. Then set your bot in that range.
Or if you plan on running an Ethereum bot for two weeks, you could do something like $2,600 to $3,400 for your range, because Ethereum has traded in that range for the last two weeks and you’re going out in an additional two weeks.
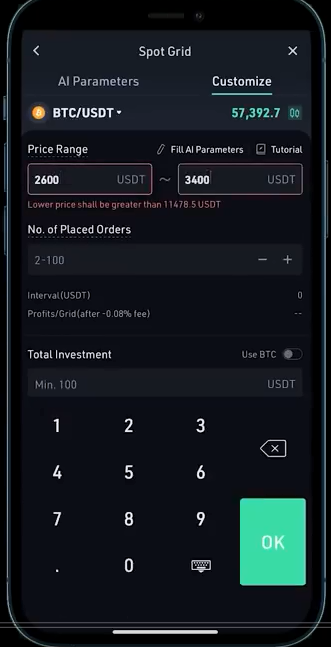
Now, it’s never going to be perfect but you want to trade within a feasible window. Typically, the AI parameter does a good job as far as picking wider price ranges. However, if you plan on running it for a short period of time, at a tighter price range, it’s typically better to customize it yourself. The number of place orders doesn’t matter too much as long as you don’t go too low. So, if it gives you the option between 2 and 100, anything between about 50 and 100 is fine. This is the bot that I dropped $10,000 into. I put $1,000 into 10 coins, half of which I use the AI parameters and the other half my own customized parameters.
Here’s how much I’ve made over the first two days. So far, every bot is actually profiting and I’m up to $420. We’ll check back later to see what I’m at after a full week. In the meantime, let’s talk about the next bot “Smart Rebalance”. At some point, we’ve all had a coin that we own shoot up in price, doubling its weight in our portfolio. And we immediately start thinking, should I take some profits? Is it going to correct soon, maybe I should sell half and put it into my other coins that are still at a lower price? If this has crossed your mind, boy, do I have a bot for you?

Smart Rebalance
The smart rebalance bot allows you to designate a percentage of your portfolio to a selection of cryptos and then automatically rebalances your portfolio so it always stays at your strict parameters. So, if you want your portfolio to always be 25% Bitcoin, you can use this and you don’t have to think about it after you set it up.
So when should you use this?
There really isn’t a right or wrong time to use it. It just comes down to your personal preference. If you are doing research day to day and your opinion on certain coins change from time to time, or if you are constantly buying and selling then this probably is not the bot for you. This is really built for the type of person who has a handful of cryptos that they really believe in, and they just want to set it and forget it.
How To Set Up
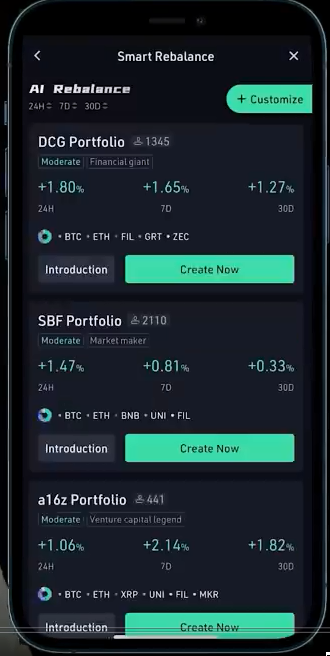
- Go to the bot page and click smart rebalance and then click Start. Here you’ll find a bunch of portfolios that you can use as a template if you want. It even shows how many people are using each and every one. This is a cool feature for checking out what other people are doing, but if you want to make your own, click Customize in the top right. You can click to add coins and select which one you want in your portfolio. In this example, we’re just going to pick ADA, Bitcoin, Link and Ethereum.
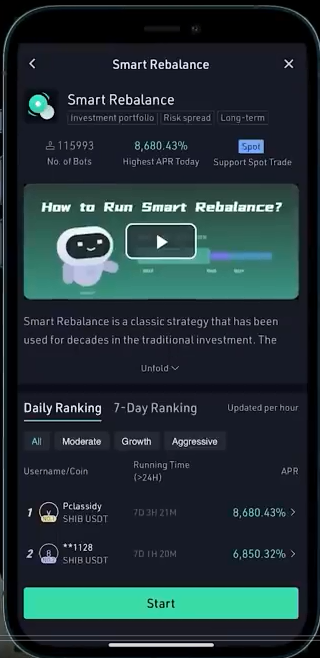
- Choose a percentage of your portfolio each crypto will take up, and you’ll see that it defaults to percentages determined by some AI programming.
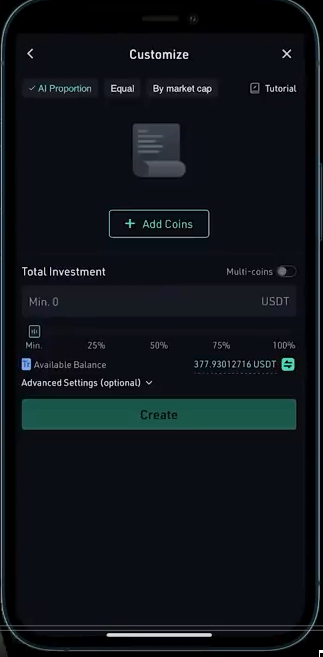
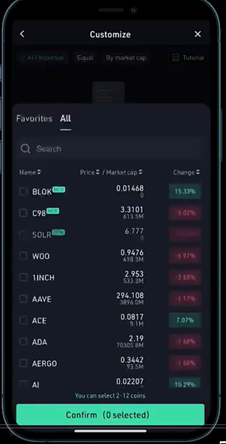
- At the top, you can also click equal weight, if you want them all to be the exact same percentage, or you can select market cap to weigh them by market cap, which is a nice feature, but something like Bitcoin, overweighs the others by a bit too much.
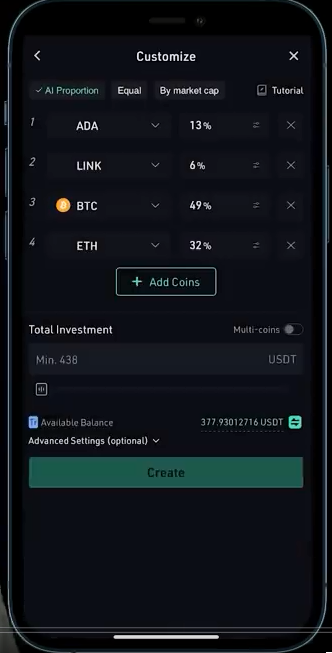
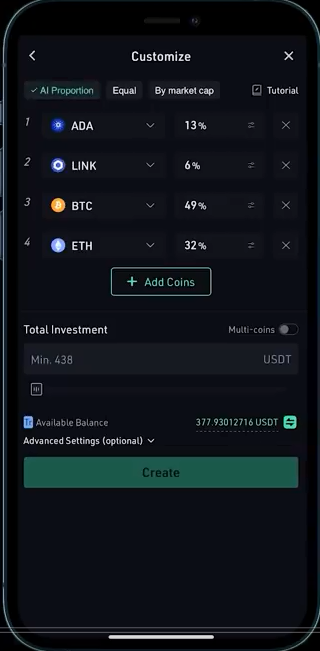
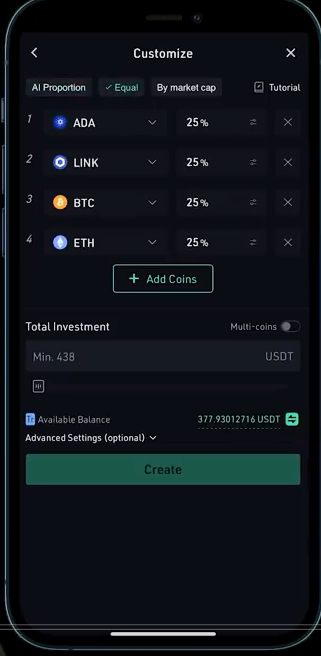
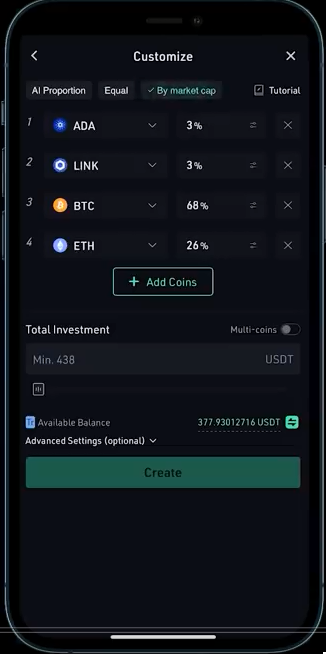
- The AI version takes into account more factors. So, it’s more evenly distributed wealth but it’s still favoring larger coins. So, if you don’t want to decide percentages yourself, then the AI option is a good choice. If you want more control, click Advanced Settings.
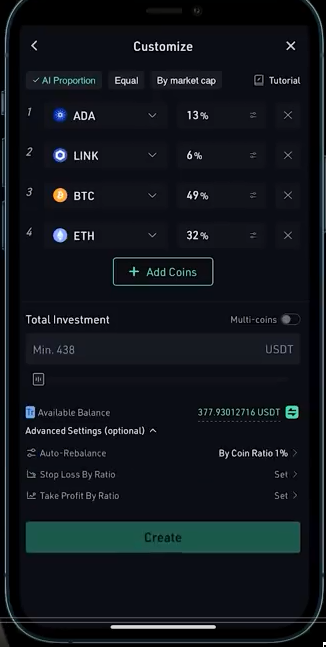
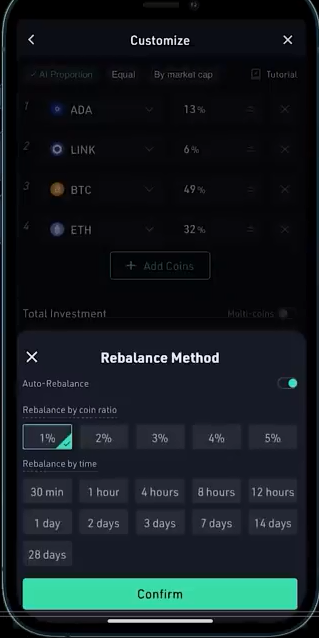
- The first setting is the “Rebalance Method”. It defaults to 1%, meaning that any time when your cryptos and your portfolio goes up more than 1%, it will redistribute the weight of your portfolio. But I think 1% is a bit low for crypto. So, I usually stick around 2 or 3%.
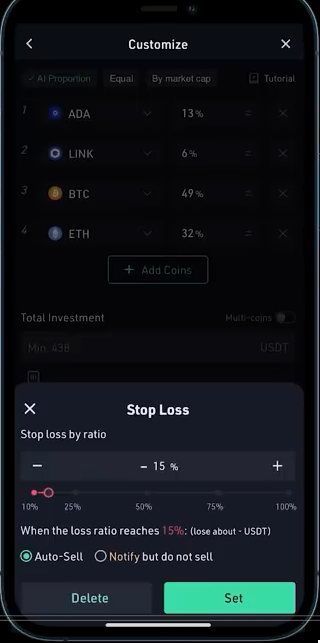
- The other two settings are “Stop Loss” and “Take Profits”, which are just percentages that you can set either to sell everything if it drops too low, or sell if you profit a certain amount. These can be really useful to take out the psychology of either crypto pumps or corrections in the market. Pick your investment amount and click Create and you’re all set.

Future Grids
Bot number three is “Future Grids”.

It’s the exact same thing as the classic grid bot but with futures. The difference is this gives you access to two additional tools:
- The first one is “Leverage”. This is when you borrow money from KuCoin or whatever exchange you’re using to increase your potential reward but also your potential risk. This is very risky and a quick way to lose all your money if you don’t absolutely know what you’re doing. Don’t mess with this, unless you’re already an expert.
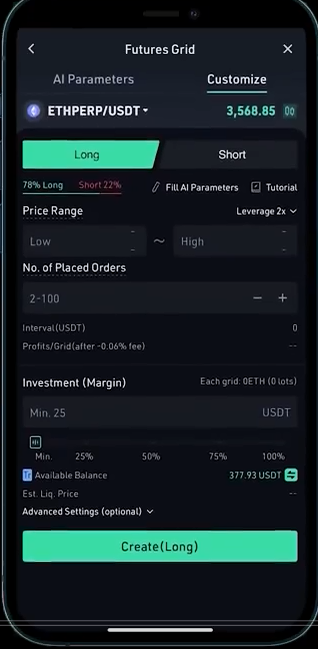
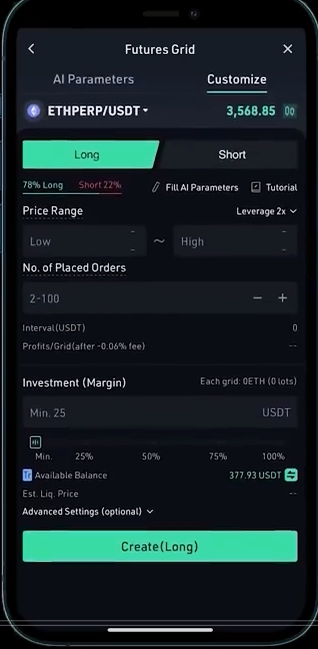
- The second tool is “Shorting”. Since, you are grid trading futures and not actual crypto, you can actually short crypto with your bot. Now, the way that you profit when shorting with a bot is either with volatility or if the price decreases and you set this up the same exact way as the other spot trading bot. Shorting is also extremely risky so tread with caution.

DCA Bot
The fourth and final bot before we reveal our profits from that $10,000 bot bet is the “DCA bot”, the dollar cost average bot. This is very useful. It allows you to invest a large sum of money into a crypto currency over an extended period of time without lifting a finger. So, instead of buying let’s say $1,000 a Bitcoin all at once, with the DCA bot, you can buy $100 in Bitcoin 10 times over 10 days, or maybe $10 in Bitcoin over 100 days.

When should you use this bot?
Cryptos can be a little bit volatile. Anytime you’re buying a large amount of one crypto, you run the risk of accidentally buying on a peak and having a very high average cost. By dollar-cost averaging, you spread out the amount of money and you remove the risk of accidentally buying on that peak.
The only issue with dollar-cost averaging is it can be an absolute pain to keep buying these small amounts and remembering, hey, okay, I need to buy $100 Bitcoin every single day at 9am. This is where the bot comes in, because it does it all for you.
How To Set Up DCA Bot
- Go to bots, click DCA, then click Create.
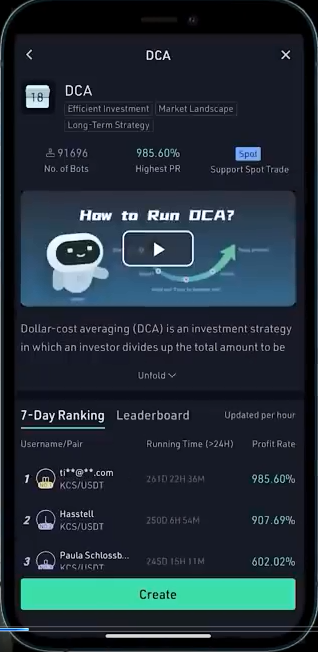
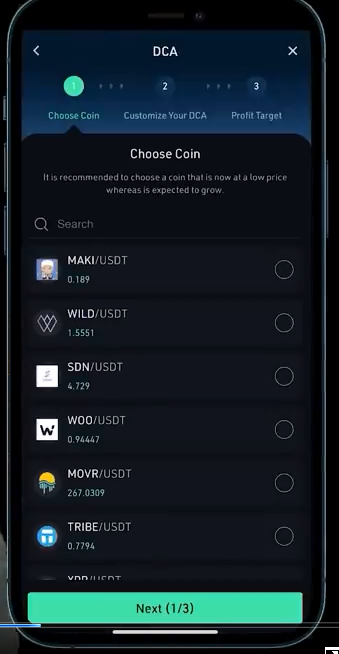
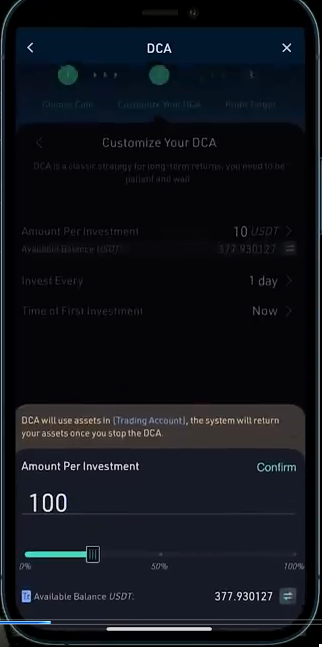
- Select the coin that you’re buying. In this example, we will do Bitcoin. Customize your DCA. This is where you will select how much you want to invest in and how frequently. So, for buying $1,000 in Bitcoin, we could just do $100 once per day, and then we have our profit target. This is where things get a little bit weird. It gives the option to shut off the bot after a specific profit is reached. So, you can either choose to have it shut off after a specific goal is met or you can just leave it on, continue, and the bot will run until you manually turn it off.

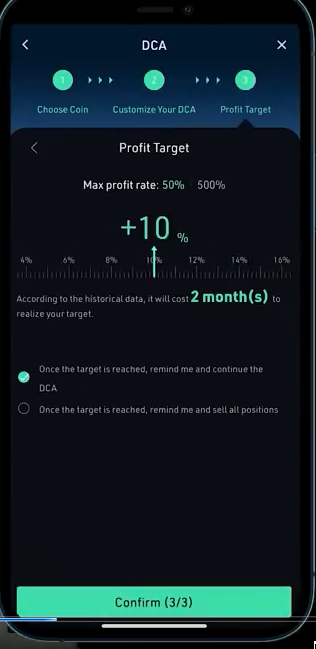
In our case, we’ll just have to set a reminder in our phone 10 days from now to shut off the bot. Another way you can do this is by only keeping $1,000 in your trading account. Then they’ll just notify you when you run out of money.
Results One Week Later
I have now been running bots on 10 cryptos for an entire week, five of which I set my own parameters, five of which I use the AI parameters. The coins are a huge variety of market cap size. So, hopefully this gives us a lot of data points. My one week profit came out to $545.25. That’s a 5.4% gain in one week. I’m actually surprised at this result, it’s higher than I expected.
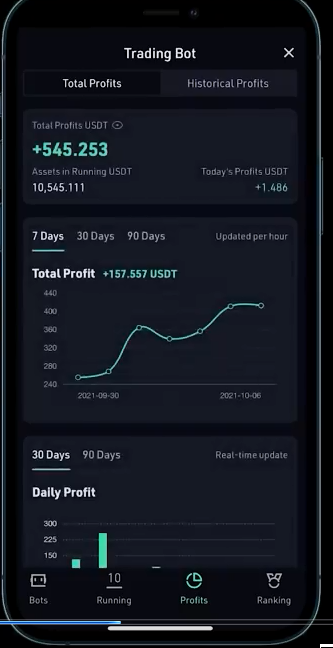
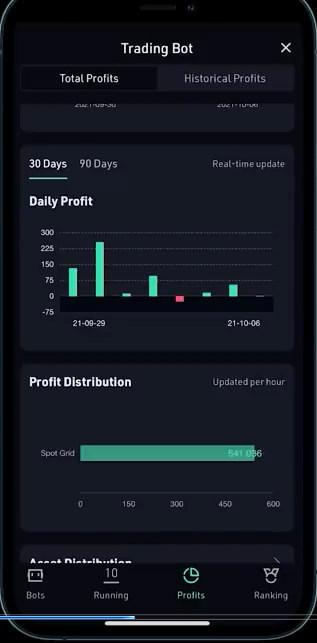
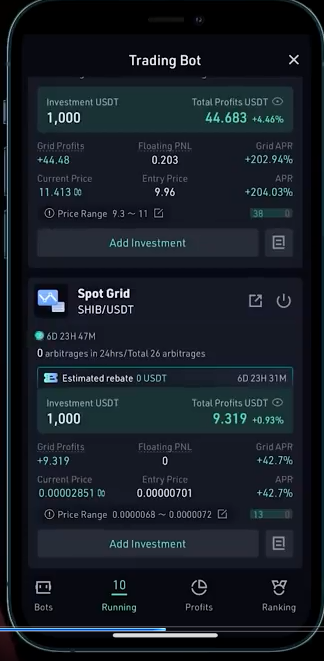
So, if we look at the Daily Profit, here we can see every single day was actually profitable, except for one day, I lost a little bit of money. And the first two days there, I made more money than the rest. If we go to the individual profits per bot, we can see that none of the bots were actually negative, not a single bot lost money in the last week. The profits here ranged from about $9 to $112 is the most profitable bot in that week. So, that one was 11.26% profit.
Lessons Learned
I did learn a couple lessons here because I could have actually made more money. So, knowing what I know now I would have just used the bot parameters for literally everything. The issue is I was setting my price parameters too small. For a few of the cryptos, it just went outside of that parameter and then stopped trading where the AI parameters were much larger. So, I would have made more money had I just kept it with AI. A bot like this is really good at limiting the downside risk. Unfortunately, that also limits your upside potential. So, in many cases, I would have actually made more money by just holding the coin outright, instead of using a bot.
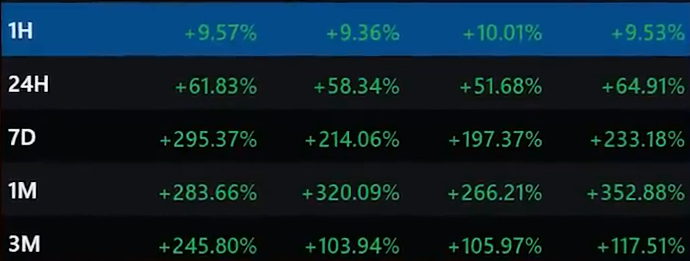
My biggest blunder here was Shiba. I set a bot on Shiba with my own parameter. Then Elon went and tweeted about Shiba. Just the other day during this experiment, the coin went crazy, and went up 295% in the last seven days. Literally since I bought it’s up 295%. Meanwhile, my bot made 0.93% less than 1% profit. I would have made $1,950 in profit, if I was just holding that crypto.
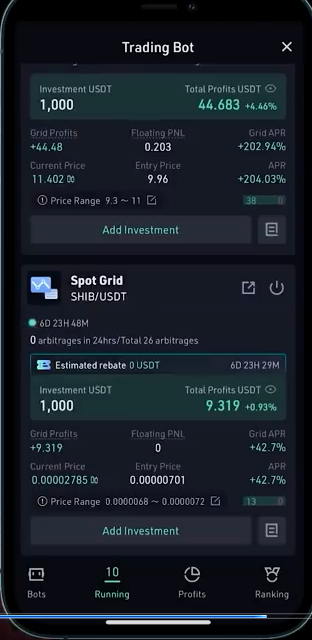
Why did this happen?
It’s because I set that trading parameter in the coin, blew that parameter out of the water and stopped trading. So, I got none of those gains. As much as this sucks, I did have downside protection, because if you use a bot and the price tanks, your bot will simply stop trading at a certain point and you’ll lose less money than if you actually just held the coins of using the bot.
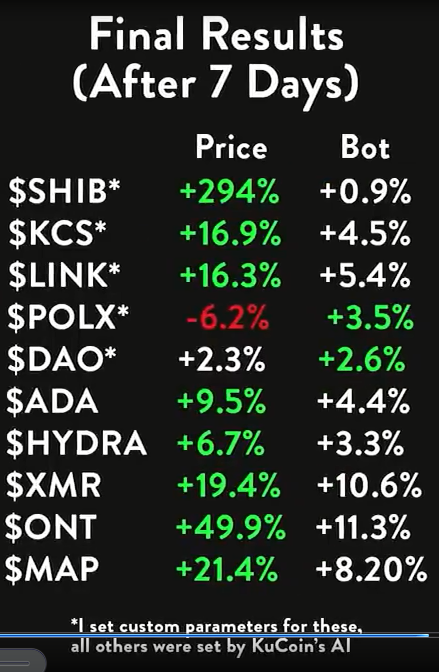
So, I made less money than I could have, but I also had less risk. I can’t complain about making $550 in seven days, doing absolutely nothing. I didn’t even check the app for five days so I can’t complain at all.
If you want to earn passive income using trading bots, click the link below to sign up for KuCoin. This will give me a small “thank you” bonus but doesn’t cost you anything.


